FAST SHIPPING (USA ONLY) FAST SHIPPING (USA ONLY)
HASSLE-FREE RETURNS HASSLE-FREE RETURNS
GUARANTEED TO FIT GUARANTEED TO FIT
FAST SHIPPING (USA ONLY) FAST SHIPPING (USA ONLY)
HASSLE-FREE RETURNS HASSLE-FREE RETURNS
GUARANTEED TO FIT GUARANTEED TO FIT

1971 Pontiac Ventura Door Latch

Find the right Door Latch for your 1971 Pontiac Ventura at CrashParts.com. We offer a wide selection of aftermarket parts, including body parts, replacement components, and accessories designed for proper fit and durability. All parts are carefully selected to meet quality standards while keeping prices competitive. Whether you’re repairing collision damage or upgrading your vehicle, our catalog makes it easy to find the exact part you need. Enjoy fast shipping, reliable availability, and a smooth ordering experience-browse the products below and order with confidence.
Showing parts for 1971 pontiac ventura

DOOR LATCH

Select Your Part

BRAKE COMPONENT
5 items
SUSPENSION CONTROL ARM
5 items
CLUTCH COMPONENT
4 items
DOOR HINGE
4 items
FUEL TANK SENDING UNIT
4 items
FENDER BRACE
3 items
PARKING BRAKE COMPONENT
3 items
WINDSHIELD COMPONENT
3 items
HARDWARE KIT
3 items
SEAT AND ACCESSORY
3 items
SHOCK ABSORBER
3 items
ENGINE MOUNT BRACKET
2 items
BUMPER BRACKET
2 items
INTERIOR DOOR HANDLE
2 items
TRUNK FLOOR BRACE
2 items
DASHBOARD AND INSTRUMENT
2 items
FLOOR PAN TOE BOARD
2 items
LEAF SPRING
2 items
TRUNK FLOOR
2 items
DECK LID HINGE
2 items
LICENSE PLATE BRACKET
2 items
DECK LID LATCH
2 items
FLOOR SIDE RAIL
2 items
VENT WINDOW
2 items
FRAME CROSSMEMBER
2 items
WHEEL HOUSING
2 items
DOOR LATCH
2 items
FUEL TANK STRAP
2 items
QUARTER PANEL BRACE
2 items
HEADLIGHT ACCESSORY
2 items
ROOF PANEL
2 items
BATTERY COMPONENT
2 items
ENGINE COMPONENT
2 items
HOOD HINGE
2 items
BODY ACCESSORY
1 items
HOOD INSULATION
1 items
SIDE MARKER LIGHT ACCESSORY
1 items
EXTERIOR DOOR HANDLE SET
1 items
HORN COMPONENT
1 items
STEERING COMPONENT
1 items
FASTENER KIT
1 items
HVAC HEATER CORE
1 items
INTERIOR ACCESSORY
1 items
TRANSMISSION COMPONENT
1 items
CONSOLE COMPONENT
1 items
FLOOR BRACE
1 items
TRUNK ACCESSORY
1 items
COWL SEAL
1 items
FLOOR PAN REINFORCEMENT
1 items
INTERIOR REAR VIEW MIRROR
1 items
FLOOR PAN
1 items
TRUNK HARDWARE
1 items
LICENSE PLATE LIGHT ASSEMBLY
1 items
PACKAGE TRAY
1 items
WINDOW REGULATOR
1 items
DOOR LOCK
1 items
POWER STEERING COMPONENT
1 items
DOOR MIRROR ACCESSORY
1 items
WIPER COMPONENT
1 items
DOOR SEAL
1 items
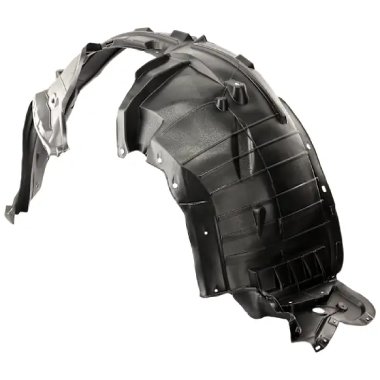
FENDER SPLASH SHIELD
1 items
DOOR SILL PLATE
1 items
HEADLIGHT BRACKET
1 items

FAQ

HID lights can also be referred to as Xenon bulbs (though not all Xenon bulbs are HID). Some vehicle manufacturers also use Bi-Xenon headlights. Bi-Xenon means the same bulb handles the high and low beams. If you have these headlights, your projector handles both, so in short, you only need to replace one bulb to upgrade or repair the functionality of your headlight.
We can provide you with installation instructions if you are unsure of what tools are needed, so please contact us for more information about your specific vehicle and parts you have purchased.
Your headlights will be warm to the touch from the heat generated by the bulb. The filament inside of a headlight bulb can reach temperatures of over 4000º F while the temperature of the glass surface of the bulb can exceed 150º F. This means that heat will naturally radiate to the exterior surface of your headlights. This intense heat is also what will help your headlights remain condensation and moisture free. However, to prevent burns or other injuries, be sure to let bulbs and headlight assemblies cool completely after use before handling.
You may well have to adjust the headlights after installation. If it's possible, when you take the old assembly out, you should match up the new adjusters with the old ones. Adjust the new light as close to that on the old units as you can. That way, any adjustments you have to make on the car once they are installed will be minimal. Our headlight assemblies have the same or improved adjusters as the stock units, and there are many videos on Youtube on how to adjust lighting. Check your owners manual too, since not all vehicles are adjusted the same way. Finally, when adjusting, make sure your car is level, with a full tank of gas.

Please send us pictures of any parts you would like us to see, so we can help you determine the proper replacement for your vehicle. In your email, send us your name, contact information, year/make/model of vehicle, and any additional information you would like to provide to [email protected].